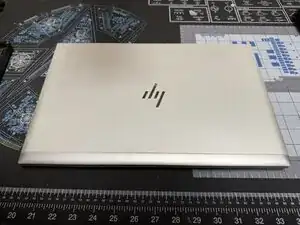
Introduction

  1. tZcpxRJXRAYbOgBf
    tZcpxRJXRAYbOgBf
    kG1CGaqCMiPMo1la
    • To start flip the device so the bottom is facing up

  2. namPNfFyx2CoJxeF
    namPNfFyx2CoJxeF
    i2VHFbEqEU6FHHAX
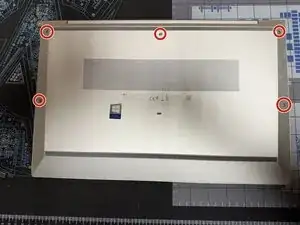
    • Unscrew the 5 marked captive screws with a Phillips #1 and flip the device so the hinge is faced towards you

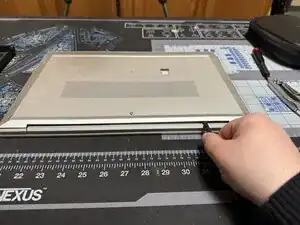
    • Slide a spudger under the shell to pop the clips and run it around the perimeter of the shell until you can remove it.

  3. 6ETP2PakPrZHjKqP
    6ETP2PakPrZHjKqP
    lGEFI2MAZ4kn2dTH
    XTjbrQAiCHH5oNTR
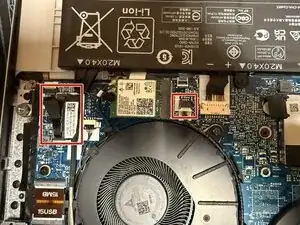
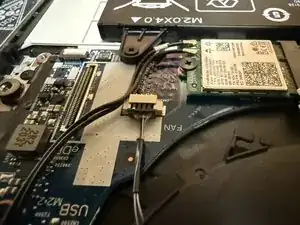
    • Unplug both marked cables. For the larger one pull it straight up gently but firmly.

    • Pull the cables out of the channels.

    • Extremely gently remove the remaining cables from the channels

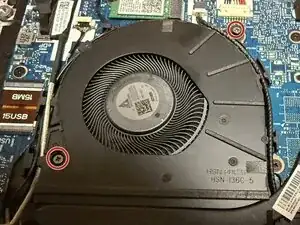
    • Unscrew the marked screws.

  4. myhjqBNquogfJGsR
    myhjqBNquogfJGsR
    GWLeWJYemwNQrXPh
    • Be careful to only pull on the plastic end of the cable.

    • Using a pair of tweezers or a spudger pull the fan cable out

    • The fan can now be removed

Conclusion

To reassemble your device, follow these instructions in reverse order.

Caleb Pierce

Member since: 19/04/22

554 Reputation

0 comments