Introduction

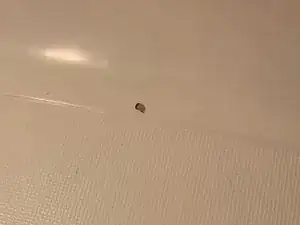
Nearly everyone has a shower, but many don’t know what to do if a crack, hole, or chip develops on the surface. Hiring a repair professional can cost hundreds of dollars, but the solution is surprisingly affordable and simple. This repair took me only about five minutes to complete, saving me time, money, and the hassle of dealing with a potential leak.

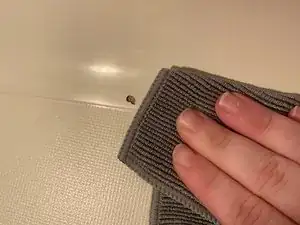
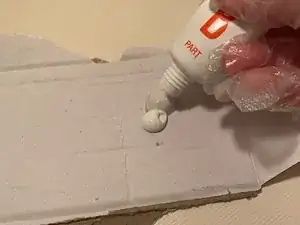
In this guide, the repair is demonstrated on a fiberglass bathtub. Be sure to ventilate the area and take appropriate safety precautions, such as wearing a mask if you’re unable to open a window and wearing nitrile gloves to protect your skin when working with the epoxy.

  1. AZpnMdMYoiyJLVg1
    • Clean and dry the surface before attempting to repair it.

    • This step allows epoxy to stick better to the tub and keeps dirt and grime from remaining in the epoxy.

  2. wtRvjwMo2xewsNeu
    • Place painter's tape around the chip in the tub or shower.

    • This helps prevent the epoxy from getting on unwanted areas.

  3. FVoZiu1pW2GjKLRV
    FVoZiu1pW2GjKLRV
    IFXHsSEbPuoZdoRO
    • Squeeze out equal parts of part A and part B epoxy onto a surface you can mix on.

    • I used a piece of old cardboard.

    • You should put gloves on for this step to ensure you don't get epoxy on your skin. Epoxy can cause skin irritation, burns, and allergic reactions. While this is rarely serious, it is recommended to thoroughly rinse skin with soap and water if contact is made. A mask is also recommended if you don't have a well-ventilated bathroom

  4. LSLdcOCEIjTPsUuL
    LSLdcOCEIjTPsUuL
    U3MLTxse6qnHDa1M
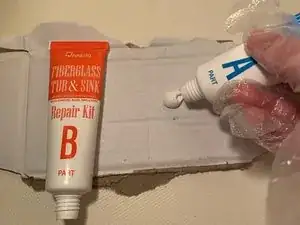
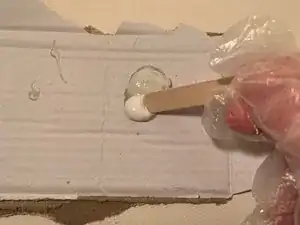
    • Use a mixing stick to thoroughly combine the two parts of the epoxy until the mixture is smooth.

    • Part B is a bit oily, so be sure to mix completely.

  5. QDk3fqZXexpjh54i
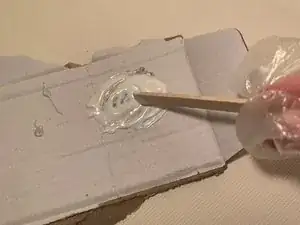
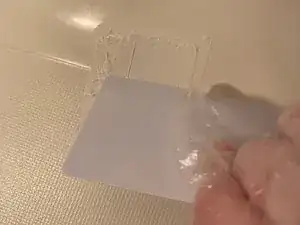
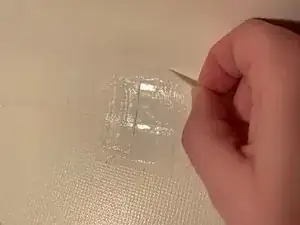
    • Apply epoxy using the mixing stick or other scooping tool, and smooth it out with an old card or putty knife.

    • If your chip is deep, you may have to use your finger to push the epoxy into the hole before smoothing it out.

    • If the epoxy goes outside the painter's tape, quickly wipe it off with a wet paper towel or rag.

  6. qGnNOarGAZ6RQYU4
    qGnNOarGAZ6RQYU4
    5lsMVlwgU5muxDQB
    • Remove painter's tape before the epoxy dries.

    • What should be left is a small square of wet epoxy. Let this cure for at least 24 hours.

  7. JEVGUxEvdNueb3fY
    JEVGUxEvdNueb3fY
    1GMkhjfkdtdCZeDb
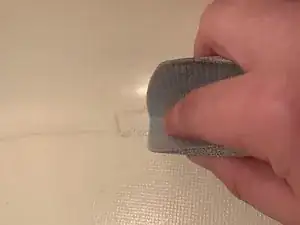
    • Use medium grit (100-150) sandpaper to sand down the area.

    • The easiest way to do this is to fold the sandpaper into the shape of a taco shell and place your finger in the crease.

    • Rub the sandpaper over the epoxy until the area is even with the rest of the tub.

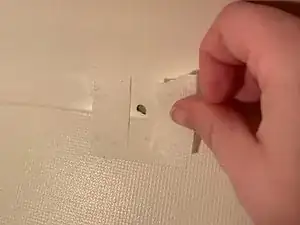
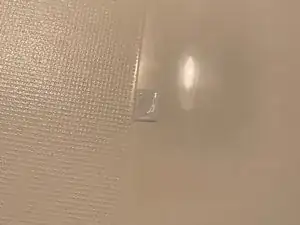
    • Wipe the area clean to get rid of any dust or debris.

Conclusion

As long as you have done all of the steps correctly, your tub should be safe to use again.

Benny Urban

Member since: 21/03/22

145 Reputation

0 comments