Introduction
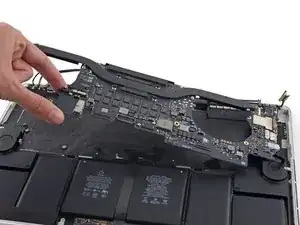
Prerequisite to remove the logic board assembly (logic board + heat sink, airport card, etc). Used for logic board and upper case guides.
-
-
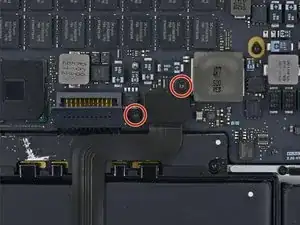
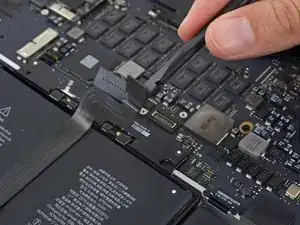
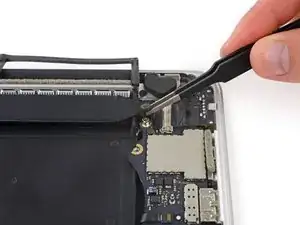
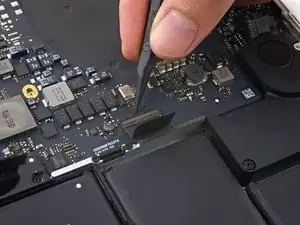
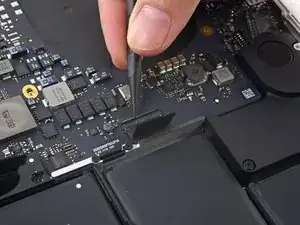
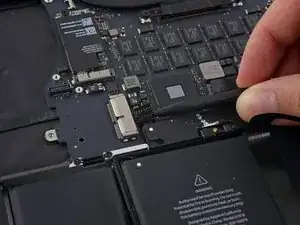
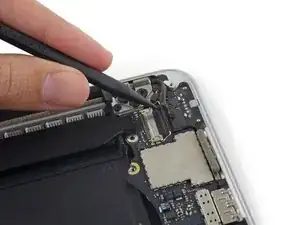
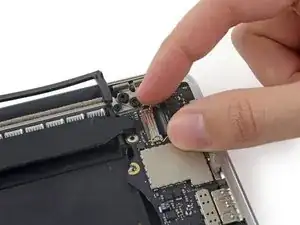
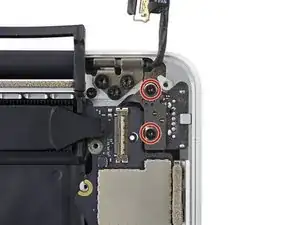
Remove the two 2.2 mm Torx T5 screws securing the touchpad cable connector cover to the logic board.
-
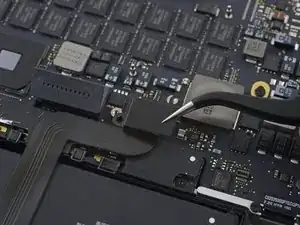
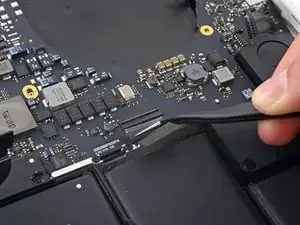
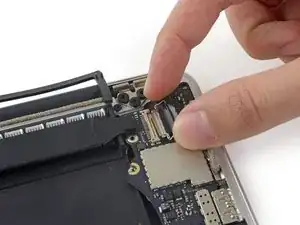
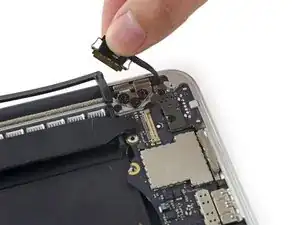
Remove the cover.
-
-
-
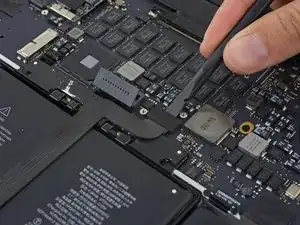
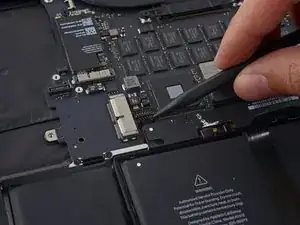
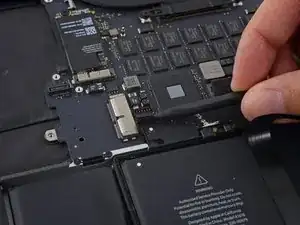
Use the flat end of a spudger to disconnect the touchpad cable connector from its socket in the logic board.
-
-
-
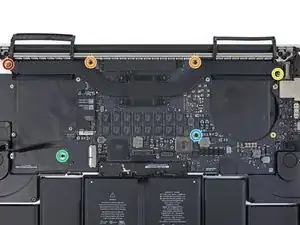
Remove the following six screws securing the logic board assembly to the upper case.
-
One 3.8 mm T5 Torx screw
-
Two 5.7 mm T5 Torx screws
-
One 5.6 mm T5 Torx screw (this one is silver and has a taller head than the others)
-
One 2.6 mm T5 Torx screw
-
One 3.2 mm T5 Torx screw
-
-
-
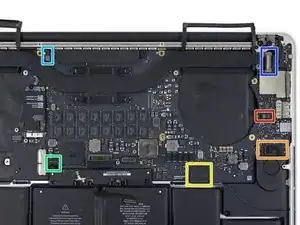
The following steps will detail disconnecting these six connectors. Be sure to read each step, as these connectors come in different styles that disconnect differently.
-
Microphone cable
-
Left speaker cable
-
Keyboard data cable
-
Right speaker cable
-
Keyboard backlight cable
-
Display data cable
-
-
-
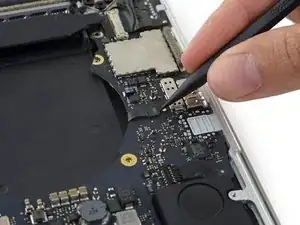
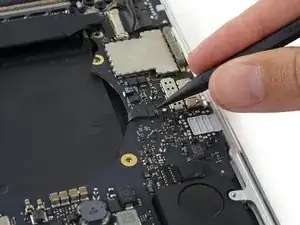
Use the tip of a spudger to flip up the retaining flap on the microphone ribbon cable ZIF socket.
-
Pull the microphone ribbon cable out of its socket, parallel to the logic board.
-
-
-
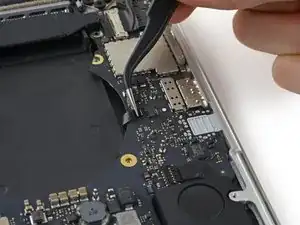
Use the flat end of a spudger to pry the left speaker connector up and out of its socket on the logic board.
-
Gently fold the cable up and out of the way of the logic board.
-
-
-
Use the tip of a spudger to flip up the retaining flap on the keyboard data cable ZIF socket.
-
Pull the keyboard data cable out of its ZIF socket. Be sure to pull parallel to the logic board, and not straight up.
-
-
-
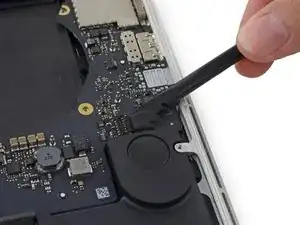
Use the tip of a spudger to pry the right speaker connector up and out of its socket on the logic board.
-
Gently fold the cable up and out of the way of the logic board.
-
-
-
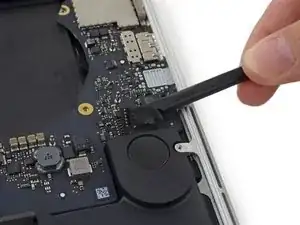
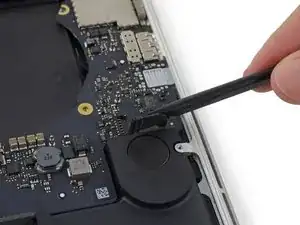
Use the point of a spudger to pry the keyboard backlight connector up from its socket on the logic board.
-
-
-
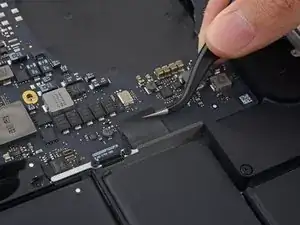
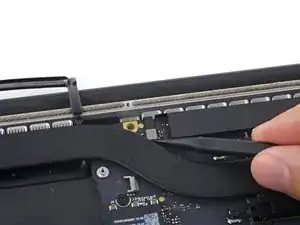
Use the tip of a spudger to flip up the display data cable lock and rotate it toward the MagSafe 2 power port side of the computer.
-
-
-
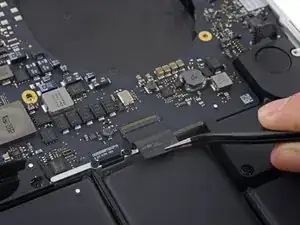
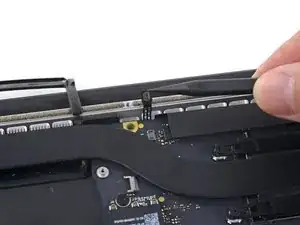
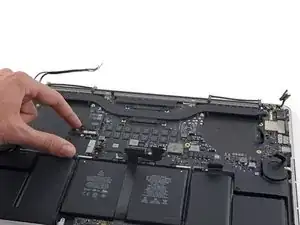
Pull the display data cable straight out of its socket on the logic board.
-
Gently bend the display data cable toward the display hinge, to expose the screws on the MagSafe 2 board.
-


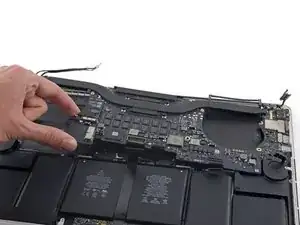

To reassemble your device, follow these instructions in reverse order.
I'm confused why it's necessary to remove the entire logic board to replace the right speaker?
Don't you just need to remove the I/O board for the right speaker?
Steve Rieck -
When you say at the top of the article, "If you're only using a mild solvent such as isopropyl alcohol to loosen the battery, you can choose to leave these components in and skip steps 6-45", you forgot to mention that steps 26 and 27 are still necessary. Hoping that the screwpost I spudged loose before I noticed these two screws won't have 86ed my board.
Gil Gilliam -